


Introduction to Writing in Obsidian
Wondering how to write your next novel in Obsidian? In this in-depth guide, I’ll walk you through my complete Obsidian novel writing workflow—from brainstorming and outlining to drafting and exporting your manuscript for publishing. With 70+ books written in Markdown, I’ve refined a system that’s powerful, flexible, and distraction-free. Whether you’re switching from Scrivener or just starting out, this article will help you master Obsidian for fiction writing.
A lot has changed and developed since I first wrote about Obsidian in Writing a novel in Markdown. I have made changes to my original post, but I think that enough has changed in my process, the apps (namely Obsidian) and in the number of people writing in Obsidian specifically that it makes more sense to write a new blog at this point than to keep trying to update the old post.
You can refer back to Writing a novel in Markdown to see some of the reasons for writing in Markdown. Besides the practical points I mentioned there like file size and corruption, I have really come to enjoy writing in Obsidian, setting it up to work efficiently for me. It is much more flexible than something like Scrivener or Word Anvil, but that also means you might have to put a bit more work into setting it up the way that works best for you. I’m not going to try to discuss all of the different ways to set it up today, but leave me a comment if you have specific questions and I’ll do a little Q&A.
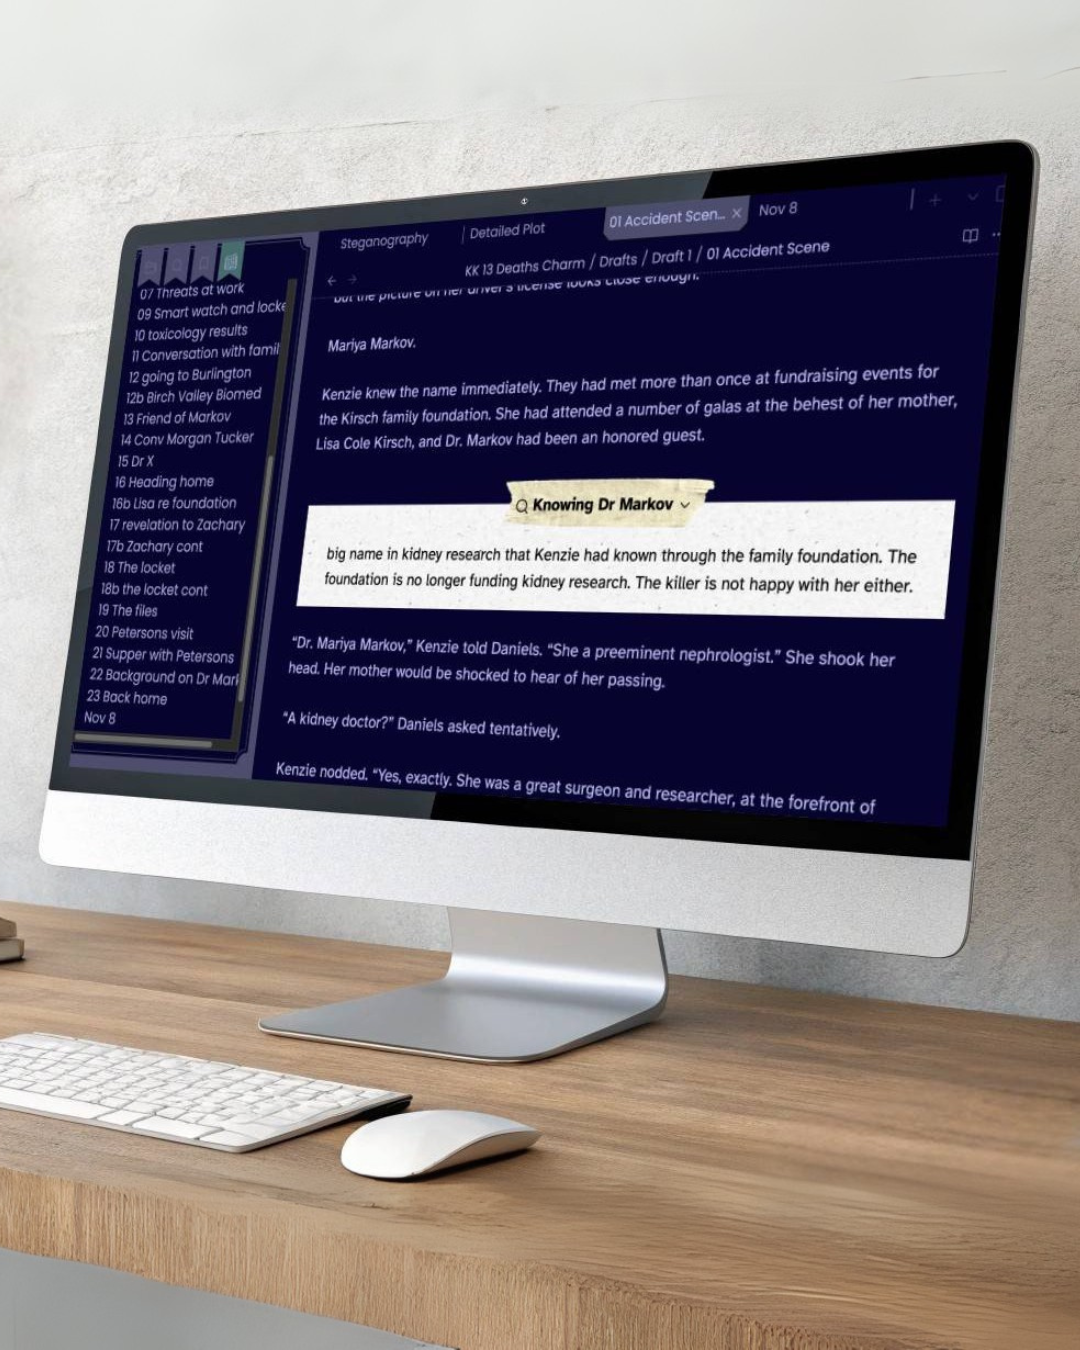
You can find a blog post on my experiment with using Callouts to track clues, notes, and tasks at Elevate Your Writing Process: Using Callouts in Obsidian.
If you are interested in my process/workflow, you can Take a Peek Behind the Curtain.
I also have a book coming out soon, The Writer’s Guide to Obsidian, A Practical System to Organize, Outline, Draft, and Edit Your Book in Obsidian. I am super excited about it!
I wouldn’t expect anyone else to replicate my process exactly, but hope that this might give you some guidance about what you can do with Obsidian to make it work for you. Take what works and leave the rest! Everyone’s brain is different.
What Makes Me an Expert at Writing Books in Obsidian?
At the time of writing this blog post, I have written roughly 70 books in markdown, most of those in Obsidian. Yes, we are talking full-length books and a few novellas.
I have published over 100 books (and written more than that.) I am one of Canada’s most prolific authors. I write various crime fiction genres — cozy mystery, paranormal mystery and adventure, private investigator, medical thriller, police procedural, other suspense/thriller subgenres, and young adult.
8 Things I Use Obsidian For
- daily reflective journal and log
- notebook
- minutes of meetings
- conference notes
- idea generation
- general records
- writing platform for blogs
- writing platform for books
3 Things I Don’t Use Obsidian For
- project and task management (I use Todoist)
- calendar (I use Google calendars in Fantastical)
- final formatting of books (I use Vellum)
Step-by-Step Novel Writing Workflow in Obsidian
Okay, let’s get down to the practicalities here! You want to know my workflow, how I have Obsidian set up, what plugins I use, etc.

Step 1 Set Up Folders in Obsidian
The first step when writing a new book is to set up the folders. I use the same folder structure across all of my books.
An Obsidian vault is just a folder on your hard drive. The subfolders and files reside on your hard drive. You are responsible for making sure they get backed up somewhere!
- Each series or world is a separate vault. Why?
- I don’t want the worlds cross-contaminated
- They are huge. I am not currently using Obsidian Sync to sync them across devices, because the vaults got too big to use Obsidian Sync. Since then, Obsidian Sync has increased their size allowances, but even so, they are pretty ungainly for Obsidian Sync. They are synced using Dropbox. There are 20+ books in most of the vaults, plus collections and translations, and these folders include graphics, audio, video, and research, not just my little md files
- Each series/world has a wiki folder with all of the world-building/series Bible stuff in it.
- Other than some character sheets, everything in the wiki folder is fairly unstructured. These are down-and-dirty working files, not anything beautiful. Everything I need to refer back to when I am writing the next book in the series.
- Each series/world has a template folder
- Each book is a subfolder
- Within each book, I have:
- archived (old drafts/versions of anything)
- backup (compiled backups of wip made every few days)
- Drafts (Longform drafts folder)
- draft 1 … 2 … 3 …
- I zip/compress previous draft folders to keep from working on the wrong draft accidentally and to keep them out of the search results
- Editor or compiling notes (tasks about things I need to look at/write/review later, formatting, things to bring to the attention of my editor)
- graphics (covers, promotional graphics, ads, videos, etc.)
- marketing metadata (back cover description, product listing, tags, tropes, comps, etc.)
- prep (preplanning – brainstorming, snowflake, outline, character sketches, etc.)
- published (Vellum output folder for this novel)
- Research and Notes

Each of those folders may have a set series of set subfolders as well. In order to quickly set up a new book, I have this folder structure set up under a folder called “New Book Template” and I opt-drag it over to the new book location to copy the folder structure to the new book with one gesture.
A note on research: This is any research done for that particular book. After a book is drafted, I copy all of that research to my main research folder, which is an alphabetic list of all of the research topics. That way, all of my research is in one centralized database organized by topic in case I need to look something up again. I don’t have to remember what book I was working on when I research a certain botanical poison, disease, forensic detail, law, etc. I often need to go back to this research when working on a later book.
Step 2 Brainstorming in Obsidian

Time to figure out what I am writing about in the next book in the series!
- Canvas – I brainstorm/mindmap on an Obsidian canvas. Random thoughts about where everything was left at the end of the last book, where I want to go next, what needs to be developed further, ideas of things I want to write about. I may check my Story Clip File for inspirations of things I wanted to write. I don’t do anything fancy here. No colours or icons, just words and connections.
- State of the Union – kicking off of the Canvas, I may write an outline of the State of the Union – where everything is in the series currently. Storylines that need to be developed further. How characters are feeling at the end of the last book, neglected series arcs, possible next developments, etc.
- #openloops – as I am writing or working on my series wiki, I tag things that have not been resolved or are ideas of things to develop in the future with the #openloops hashtag. During the brainstorming process, I search for this hashtag and review outstanding open loops.
- This is a somewhat cyclical process. I will keep going back to the mindmap to add new thoughts and connections and waiting for a particular storyline to gel. I may use other tools to help generate new ideas for the series, and feed them all back into the process until I hit on a storyline that I want to use.
- Short Outline – at the end of this process I will probably have a short overall outline for the book
Step 3 Plot Development in Obsidian

- Snowflake – I use some variation of the Snowflake Method for most books. Starting with the germ of the idea for the book – the idea or short outline, I develop a logline. Then a five-line summary of the plot (which I may already have in the short outline) and the back cover copy for the book. But sometimes I work backwards and have a blurb/back cover copy/product description before I go to the logline. Either way, at some point, this is a touchstone and I work through the Snowflake process.
- Marketing metadata – the logline and back cover copy developed as part of the Snowflake Method become the springboard for other marketing pieces. Taglines, tropes, SEO keywords, BISAC categories, comps, title possibilities, visuals, and an expanded product description to be used when I list the book for sale. Generating this information before the book is written helps to focus my writing on what readers are looking for and how they will find this book. My writing is automatically focused around the tropes, genre keywords, etc. that readers love. Any of this stuff can/will change during the writing process, and I will come back to it and update it after draft 1 is finished.
- Character development and backstory – all of the above generally happens the first day of planning. Then it is time to dig deeper. I confess that I don’t always do character sheets before beginning my writing. Since I am writing in series, most of the characters are already established, and there are only a few more added in each book. And sometimes I prefer to develop/discover those during the writing process. But I also like to develop pictures of new characters, so sometimes so sometimes a character sheet may only consist of a name and picture before I start the first draft. But sometimes I do character sheets for everyone, even my established characters. They are facing a new challenge and new obstacles, after all, and that is what the story turns on.
- Research – it seems like there is always something to be researched before beginning. Drugs or poisons, laws, forensic procedures, mythology, culture, technology, etc. I try to do most of my research before beginning so I don’t get bogged down with it in the middle, or skip over it and have to come back to rewrite part of the book later.
- Detailed Outline or Kanban – I go back and forth between using a nested outline or a Kanban board for my detailed outline. sometimes I use one, sometimes the other, sometimes I switch between them. Although this says “detailed” it is not what many writers would consider detailed. It is not a chapter-by-chapter outline. It is more detailed than a beat sheet, but still is broad strokes. And I often don’t know the killer or have a particular ending in mind before beginning. I expect to work that out at about 3/4 of the way through drafting the book.
Tip: How to get your chapters out of Scrivener and into Obsidian:
- File > Export > Files…
- Select Export text files as: MultiMarkdown (.md)
- Under options, I select:
- Number exported files
- Append “.md” extension
- Convert rich text to MultiMarkdown
Step 4 Cover and Title

- This may happen after Step 3 or any time during the above development. I start brainstorming titles as part of the development process. I pick out the ones I like the best and run them through Goodreads to see what similar/identical titles exist and don’t use anything that is too close to another book’s title. Of course, that doesn’t stop someone from using one of my titles after I do… which has happened in the past.
- I love having the cover and title picked out before writing, so I will have at least a mockup cover done before I begin writing. Usually, the cover/title do not change after the book is written, but sometimes they do.
Step 5 First Draft in Obsidian

- I set up the Longform project and Draft 1. The most important thing that Longform does for me is to compile my individual chapters into a manuscript (stripping the front matter). Any other functions of Longform (word counting/targets, moving scenes around, etc. are nice to have, but not necessary for me.
- Each chapter is a separate file
- Each chapter is named with a number and brief description of the scene. This ensures that I can always sort them in order in the file Finder (Explorer) as well as within Longform. And I can find the scene where xxx happened by the chapter description
- I often draft in the Oh Write sprint room because I like hanging out with the other authors there and watching my words earn little gold stars. So at the beginning of the day I just create a file named by the date (eg. July 1) and copy my words from Oh Write into it periodically throughout the day. I know when I hit my daily word goal because it is tracked in Oh Write and that day’s words are all in one file. Oh Write doesn’t say anywhere that it uses markdown in the editor, but it does. So I just insert ## a space and my Chapter number and name, use Text Expander to insert my YAML header, fill in the properties, and write. I keep copying the Oh Write window into my dated file in Obsidian through the day to prevent any loss. At the end of the day, I use the Refactor plugin to split it into chapter files based on the H2 headings. A few keystrokes and that is done.
- At the end of each day I write a summary of each chapter.
- I refer back to my detailed outline, make adjustments to it as necessary, do any additional research required, etc. and keep writing until the first draft is done.
Obsidian Properties
I track main characters in a scene, scene setting, timeline, etc. in the YAML header/Obsidian Properties. That allows me to track them with Dataview query tables so I can find which scenes particular characters were in, keep on top of what day of the week it is, etc.

I make notes of things I know I will need to remember later in the story or add to the wiki.

Tasks

- I use cmd-L to create a checkbox whenever I think of something I need to do, without interrupting the flow of what I am working on. It may be something I need to research, something I need to go back and fix in the previous chapters, something that needs to happen later in the story, etc.
- I use a queries to pull uncomplete/complete tasks into a summary so I can see them all in one place.
- These are outside my project/task management system (which is in Todoist) because there is no point in having these tasks outside of the manuscript and every reason to have them right there in my manuscript and not to have to refer to an outside source. “Edit draft” is in my task management system, but not all of the amendments that need to be made.
999
- In addition to using task checkboxes, I occasionally use 999 to indicate something I need to come back to and look at later. I use this particularly for editor notes or formatting notes. Checkboxes do not carry through when I convert the compiled markdown file to a docx file, but 999 does.
Draft 2 in Obsidian

I zip a copy of Draft 1 and rename the uncompressed folder Draft 2. Then I am ready to start my first round of edits.
- Checkboxes – the first thing to do is go through any checkboxes or 999 markers to get them straightened out. Some will not be addressed in this draft, but most will.
- Read – I read through a chapter at a time, making corrections, rewording, expanding descriptions, deleting extra words or redundancy, seeing how the whole thing flows.
- Critique – I run each chapter through an AI critique process, which helps to identify awkwardly worded sentences, inconsistencies, highlight areas that could use more sensory descriptions, etc.
- Grammarly – I copy and paste each chapter into Grammarly, run it through any necessary changes, and copy and paste back into Obsidian. I have found Grammarly Desktop too flaky. Grammarly accepts markdown text without any complaint and copies it back again without loss of headings, bolding, italics, etc.
- Text to Speech – I have run some manuscripts through text to speech, but I find this is a lengthy process that isn’t necessarily worth the time. I may use it on and off in the future, but don’t feel I get enough out of it to use it on every manuscript.
Additional Drafts in Obsidian
- The manuscript then needs to be “seasoned” for 30 days. No looking at it or touching it during that time. Unless, of course, I need to refer to it to answer a question for the next book.
- The next draft is a high-speed read to help pick up any inconsistencies, plot holes, continuity errors, etc.
- Another revision a month later to read the first and last chapters out loud and polish them up the best they can be to present the best possible product to those readers who read the first or last chapter before buying.
- Maybe another revision. Then I will do a full spelling and grammar check in Word before passing it onto my editor (see process for conversion below.) Then revisions from my editor. Format in Vellum. Then out it goes to ARC readers. Make any final changes and upload final version to all platforms.
Obsidian Workspace

I have a fairly fluid workspace, changing configurations as I need to, just as if I was working on a real desktop and readjusting a typed manuscript and notepads as my needs change. Generally, I have the current draft/chapter in the main editor, possibly with several tabs open with my tabular summary, detailed outline, and research notes open. On the left is usually my Longform scene explorer, unless I am navigating to for files outside of the manuscript (research files), and then I switch to the Obsidian explorer. I also search within the draft folder I am in as needed. Sometimes I also pin a “goal” document at the bottom left with the words I need to write that day broken down in 500 word chunks with a checkbox for each, or the number of chapters I need to edit that day with a checkbox for each. It is motivating to check off my progress. On the right I have the properties info panel open, or else a split-right editor with the chapter-by-chapter summary open on the right. Sometimes also a scratch note with upcoming scenes pinned below the property inspector.
Getting it out of Obsidian
Compile the Chapters

This is where Longform shines. First I check for any other checkboxes or 999 marks that I have not addressed. Then, using the Longform plugin, I can compile all of the chapters into one long markdown file, with the front matter of each chapter, comments, etc. stripped out.
Warning: Here is something I just learned. Do not use the “Strip Frontmatter” option if you don’t have frontmatter in each chapter. It will strip out anything between your first two — dividers. If those are scene breaks, it is going to delete your scene 2!
Pandoc
With the Pandoc plugin, I convert the markdown file to a docx file for my editor.
I make a few style changes to the docx file, making the Body paragraphs 1.5 line spacing with a first line indent and reformatting the headings. I add a header and footer to the pages. Then I do one last spelling and grammar check within Word, check for any formatting issues, and send it off to my editor.
Formatting
After getting the file back from my editor, reviewing comments, and accepting or rejecting each change, I open it up in Vellum, creating a new Vellum project file for the book. I select the saved formatting style for that series, and add the front and back matter from my template file. After a couple small tweaks (adding ISBN numbers, dedication, etc.) it is ready to go off to my ARC group, the last step before publication. Vellum generates the interior book block pdf and the epub ebook needed to publish both the print and digital versions of the book.
Vellum does not retain all formatting, so if you have sections that will need to be converted to alignment blocks or other special formatting, I suggest that you use a symbol combination to mark each of those sections while working in Markdown, and then search for that combination in the Vellum file and format it accordingly.
eg. use “999 alignment block” and search for 999 in the text in Vellum after importing.
Vellum also may not import graphics embedded in your docx file. You may need to insert them manually.
5 Essential Templates in Obsidian
The templates that I use regularly during the novel writing process are:
- Snowflake Method – outlines the snowflake method, includes callouts for the logline, summary, etc.
- Character Sheet – name, picture, motive, conflict, etc. and a section for the character to introduce himself in his own voice
- Tabular Summary – yaml properties in a table so I can easily follow which scenes characters were in, setting, timeline, etc., as well as sections for notes, tasks, and draft control
- To Do list – for tracking tasks to be done at each stage of writing – global tasks, queries for open and finished checkboxes, tasks to be completed before finalizing the book
- A couple of marketing templates
In my main Obsidian vault
Yes, I do have writing stuff in my main vault as well. This is where I “live” when I am not writing and I don’t like bouncing around between different vaults as I set up promotions, write blog articles, and so on. Some of the writing business stuff you will find in my main vault includes:
- Ad Copy – a separate file for each book
- Pull quotes
- Blurbs
- Tweets/Tiktok captions
- Research – as mentioned above, organized in folders by topics. All of the research for all of my books gets copied back here.
- Story Clip File – ideas for future stories, articles I have clipped as inspirations, etc.
- Conference notes
- Questionnaires
- Interviews
- Blog posts
Essential Obsidian Plugins for Authors
This is all of the plugins that I use, but some vital or very useful ones:
6 Top Plugins for Writing books
- Longform – compile all of my chapters into one document
- Notes Refactor – break out scenes by headers, various other methods to break a files down into multiple files
- Pandoc – convert my compiled document into a docx Word file
- Kanban – work with an outline in Kanban format
- Advanced Tables – I’m not sure now how much I need this with the latest Obsidian upgrades
- Dataview – for the queries shown above
6 More Top Plugins for Obsidian
I also use these in my main vault:
- Periodic Notes – for my daily notes, weekly dashboard, etc.
- Autolink Title – paste a URL and it will past the weblink with the proper name
- Todoist Sync – allows you to send tasks from Obsidian to todoist or query Todoist tasks within Obsidian
- Whisper – transcribe audio files
- Ytranscript – transcribe youtube videos
- Text Generator – like having ChatGPT inside of Obsidian. Interact directly with OpenAI models and have the output automatically saved within Obsidian. No need to copy and paste. Useful for:
- formatting transcribed files
- summarizing content
- brainstorming
- generating social media posts, ad copy, etc.
5 Essential Core Plugins for Obsidian
- Outline
- Canvas
- Properties
- Templates
- Bookmarks
10 Programs I Use in Conjunction with Obsidian

- Oh Write (online sprint room)
- Text Expander – insert my usual YAML header (whether I am working inside Obsidian or in Oh Write or somewhere else), my bio, and other snippets of text I need regularly. I haven’t found any program that does it as well as Text Expander.
- PopClip – includes various tiny utilities, including some relating to markdown editing, fixing upper/lower case, and sending text to Todoist and Fantastical.
- LibreOffice/Word – word processing
- Vellum – formating for publication – pdf and epub
- Todoist – project and task management
- Google Calendars in Fantastical – calendar/time blocking
- Vista Social – scheduling social media posts across social networks
- Canva – graphic design
- Photopea – an ad-supported Photoshop clone

Obsidian for Writers
Organize and Write Your Next Novel with Obsidian
Annotations
Elevate Your Writing Process: Using Callouts in Obsidian

Writing a Novel with Obsidian
Writing 70+ novels in Obsidian
FAQ: Writing a Novel in Markdown
- What is Markdown and why is it good for writing novels?
Markdown is a lightweight markup language that lets you format text using plain characters. It’s ideal for novel writing because it keeps your content distraction-free, easy to back up, and compatible with many writing and publishing tools. Shorter, lighter content is less likely to get corrupted than the bloated files in other programs. - Can I write a complete book using only Markdown?
Yes, you can write an entire novel in Markdown. Many authors use tools like Obsidian, Typora, Ulysses, or VS Code to draft, organize, and export their books from Markdown to various formats like DOCX, EPUB or PDF. - Which Markdown apps are best for fiction writers?
Popular Markdown apps for fiction writers include Obsidian (great for linking and organization), Typora (for WYSIWYG writing), and MarkText. Each offers a clean interface and powerful export features. - How do I organize my chapters and scenes in Markdown?
You can use folders, nested files, and headers (e.g.# Chapter 1,## Scene 1) to structure your manuscript. Tools like Obsidian also let you link between notes and use tags for easy navigation. - Can I export my Markdown novel to Word or PDF for publishing?
Yes, you can export your Markdown files to DOCX, PDF, EPUB, and more using tools like Pandoc, Marked 2, or built-in export features in your Markdown editor. - How do I handle formatting like italics, bold, and scene breaks in Markdown?
Use*italics*,**bold**, and***or---for scene breaks. These simple syntax elements are easy to learn and work across all Markdown platforms. - Is Markdown compatible with self-publishing platforms like Amazon KDP?
Yes, Markdown can be converted to EPUB, DOCX, or PDF for uploading to Amazon KDP and other platforms. With proper formatting and conversion tools, it’s easy to prepare your novel for publishing. - Does writing in Markdown help with writer’s block or productivity?
Many writers find Markdown’s simplicity reduces distractions and improves focus. The plain-text environment encourages flow and makes it easier to maintain momentum. - What are the disadvantages of writing a novel in Markdown?
While Markdown is flexible and minimalist, it may lack some of the visual tools of rich text editors. Advanced formatting, footnotes, and tables may require extra setup or external tools. Apps like Obsidian with endless customization options can tempting and distract writers from their #1 job—writing! - Can I collaborate with editors or beta readers using Markdown?
Yes, you can share Markdown files via GitHub, Obsidian Publish, Google Docs (converted), or export them to Word for tracked changes. Tools like HedgeDoc or HackMD also support real-time collaboration.


Thank you for this article, I look forward to the full book in December!
Pingback: Writing in the Age of Endless Options and Bad Advice on how to be Productive – Curtis McHale
I’m thrilled to have stumbled upon an article like this! I’m a French speaker and have been using Obsidian for over a year for knowledge management. This year, I started using it more and more for novel writing. Your workflow fits perfectly with my approach (plus I also write in series) and I am currently applying it to my own writing system, with a few adjustments. I am eagerly awaiting the release of your guide (I pre-ordered it right away) and thank you for this comprehensive article, which provides clear and precise steps that can be replicated for any novel project.
By the way, I’d also like to know how you promote your books, the marketing aspect, etc. Or does your publisher take care of that side of things?
I have been using Scrivener for some years but I thought I would try Obsidian. Lots of advantages but one big obstacle for me. I need to indent dialogue, but any attempt to do this results in the dialogue being formatted in another font, I’m guessing the code block font. It makes no difference whether I have disablef the tab button or if I am trying to indent using spaces. The font is still changed.
Yes, markdown assumes you want spaces between paragraphs rather than indenting. If you *have* to see it as indented, you can do that with a css snippet. There may also be plugins available. I just deal with it by styling in the exported document (Word or Vellum) which will automatically take care of the paragraphs throughout the document. No matter what program you are using, you should not be using tabs or spaces to indent.
Thanks for the great rundown! I just “graduated” from OneNote to Obsidian for some writing I started earlier this year, and your post really got me off to a good start. The metadata is fantastic, and I love the ability to make little helpers through Dataviewjs: character browsers, timelines, a to-do list, a list with a “sticky” tag, etc. Just the act of transferring my worldbuilding and the 35k or so of written narrative into Obsidian improved it, and your structure and workflow suggestions were exactly what I needed. Thank you!
Glad you found it helpful!
Thank you so much. Even if I can’t fully grasp all of this, it still gives me a sense of understanding.
Feel free to ask questions here on on the Obsidian discord #creative channel
Pingback: How I Use Obsidian For Writing - The Write Directory
Parabéns!!! e agradeço por disponibilizar o seu tempo em compartilhar como elabora o seus livros. Grande ajuda!
This is amazing, thank you for taking the time.
This is a really good article, thank you for sharing your system with us!
Are you planning to demo perhaps in greater depth how you leverage AI within Obsidian? I’d love to hear more on that from the perspective of a non-native English speaker.
This is a great article. Exactly what I need. I have been writing in Scrivener/Docs but need an escape. I appreciate you detailing your workflow. I must buy one of your books now. Thank you.
Glad you found it helpful!
It is very quick to get your files out of Scrivener into markdown format. Ping me back if you need help.